Multi-Bike Compression Super Rack
The living room of my house has been in rather sad shape since we moved into the place in June. Although the space worked great for stashing bikes, it wasn’t providing much in the way of other usefullness. For the first three months, we had all the furniture and decorations from our landlord, which were, to say the least, of “interesting” taste. After she moved her stuff out, we went from having a room filled with junk, to bare room with nothing but a couch. Then my roommate bought a TV, which he set up on top of the cardboard box it came in. Then he bought a computer, which he set up on top of the cardboard box it came in. The room was starting to show promise, improving from its former status of “crack house living room minus the needles and pipes,” and was well on its way to reaching the status of college house. (baby steps)
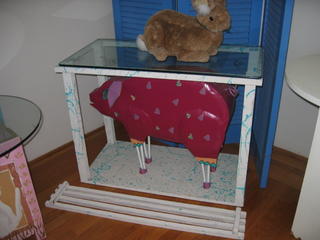
The "Pink Pig", our land lord's most prized possession. This was actually the one thing I liked, if that says anything about the rest of her tastes.
Things really started to pick up pace recently though. The TV was relocated to the floor, and the computer box was replaced with an actual table. Yes, a real table; four legs, made of wood, standard IKEA issue. Hence, the bar was raised, the gauntlets were off, and I stepped up to do my part; it was time to build a bike rack.
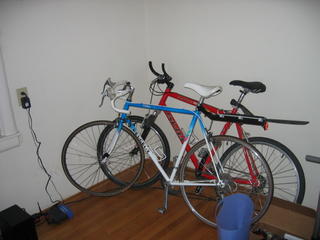
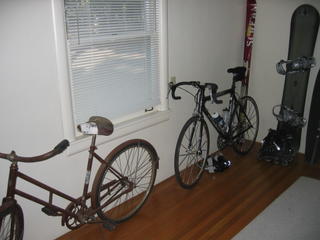
Bikes scattered in the room
The requirements for the rack were high, needing to hold a minimum of 6 bikes, plus room for expansion if necessary. The bikes would have to held vertical, to take up the minimum amount of space. The entire setup would need to be aesthetically pleasing, and most importantly, it would be spuedo-free standing, requiring no bolts, or drilling, and not to cause any scratching or damage what-so-ever to the floor, walls, or ceiling.
Enter the Multi-Bike Compression Super Rack.
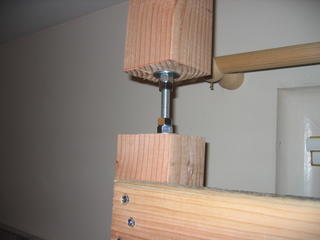
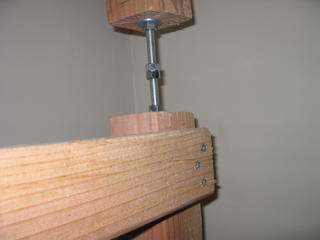
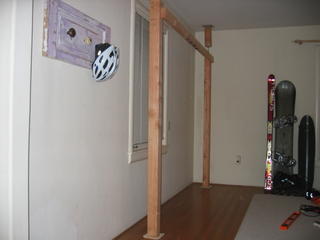
Borrowing an idea used for years by UW-Madison students to loft their beds in the dorms, I constructed the super rack to utilize two expandable posts, which would be held in place by being compressed between the ceiling and the floor. A 2X4 stretching across the two support posts provided ample space to hang the bikes from.
Supplies:
Two 8 foot 4X4 posts: $16
One 8 ft 2X4 :$4
Two 1 foot, ½ inch threaded rods: $5
Six heavy duty rubber screw hooks: $10
Eight ½ inch nuts and washers: $2
Four squares of carpet: Free (Actually, the label said they're supposed be returned to the store in 24hrs. Oops.)
One quart of paint : $10 (optional, I might leave it natural, aka, be too lazy to take it down, outside and paint it.)
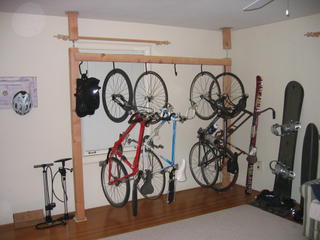
Overall, very pleased with the end results.

The "Pink Pig", our land lord's most prized possession. This was actually the one thing I liked, if that says anything about the rest of her tastes.
Things really started to pick up pace recently though. The TV was relocated to the floor, and the computer box was replaced with an actual table. Yes, a real table; four legs, made of wood, standard IKEA issue. Hence, the bar was raised, the gauntlets were off, and I stepped up to do my part; it was time to build a bike rack.


Bikes scattered in the room
The requirements for the rack were high, needing to hold a minimum of 6 bikes, plus room for expansion if necessary. The bikes would have to held vertical, to take up the minimum amount of space. The entire setup would need to be aesthetically pleasing, and most importantly, it would be spuedo-free standing, requiring no bolts, or drilling, and not to cause any scratching or damage what-so-ever to the floor, walls, or ceiling.
Enter the Multi-Bike Compression Super Rack.
Borrowing an idea used for years by UW-Madison students to loft their beds in the dorms, I constructed the super rack to utilize two expandable posts, which would be held in place by being compressed between the ceiling and the floor. A 2X4 stretching across the two support posts provided ample space to hang the bikes from.


Supplies:
Two 8 foot 4X4 posts: $16
One 8 ft 2X4 :$4
Two 1 foot, ½ inch threaded rods: $5
Six heavy duty rubber screw hooks: $10
Eight ½ inch nuts and washers: $2
Four squares of carpet: Free (Actually, the label said they're supposed be returned to the store in 24hrs. Oops.)
One quart of paint : $10 (optional, I might leave it natural, aka, be too lazy to take it down, outside and paint it.)
Overall, very pleased with the end results.



1 Comments:
yeah, as you should feel lame.
The carpet samples were just little 4X4 squares, which fit perfectly on the top and bottom of each post.
Post a Comment
<< Home